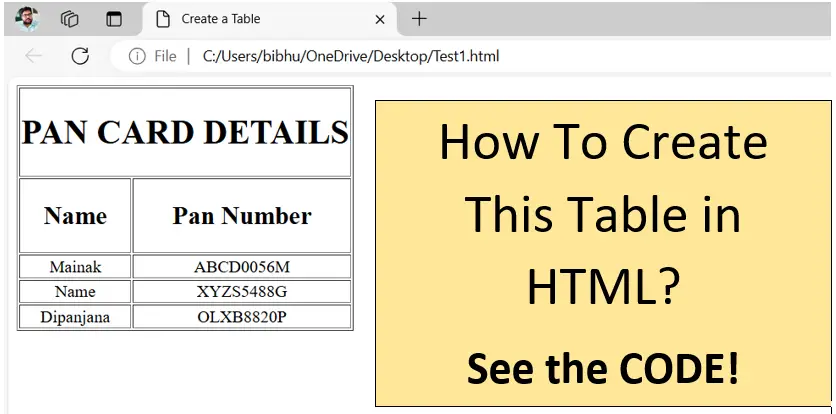
In this tutorial, we will create a simple HTML page that includes a table displaying PAN card details. We will go through the code step by step to understand each part.
Step 1: Basic HTML Structure
First, we need to create a basic HTML document structure, which includes the <!DOCTYPE html> declaration, <head>, and <body> sections.
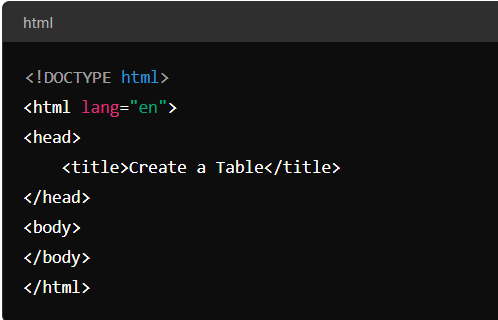
<!DOCTYPE html>: Declares the document type and version of HTML (HTML5).<html lang="en">: Opens the HTML document and sets the language to English.<head>: Contains metadata about the HTML document, including the title.<title>: Sets the title of the webpage, which appears in the browser tab.<body>: Contains the content of the webpage.
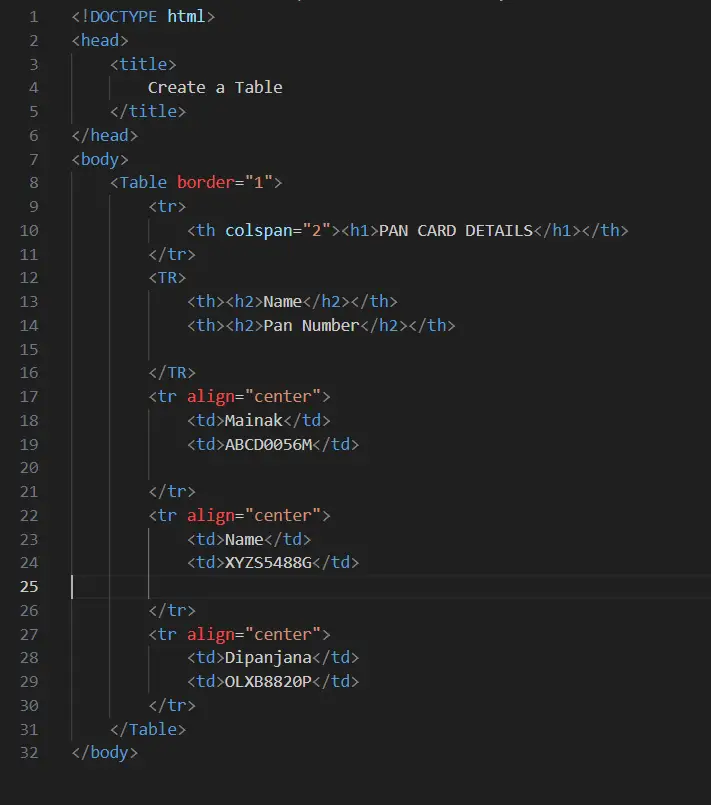
Step 2: Adding the Table
Next, we add a table to the body of the HTML document.
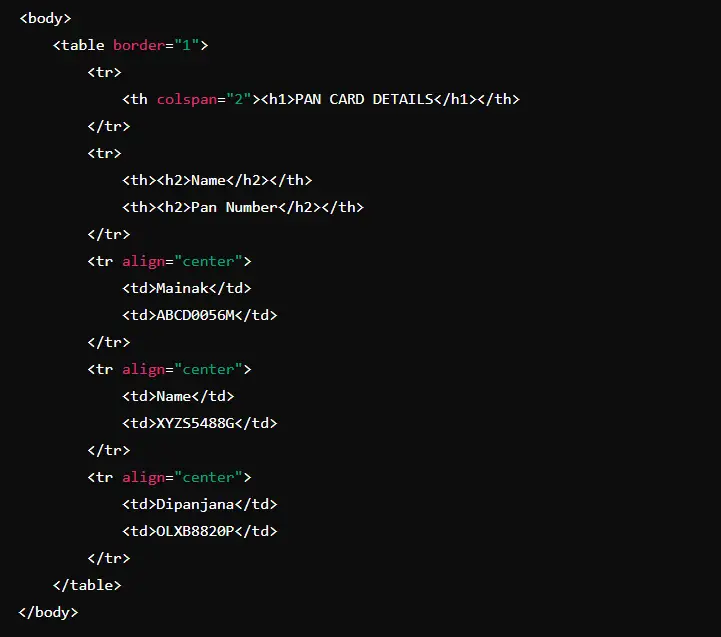
<table border="1">: Creates a table with a border of 1 pixel.<tr>: Defines a row in the table.<th>: Defines a header cell in the table. Thecolspan="2"attribute makes the header span two columns.<td>: Defines a standard cell in the table.
Step 3: Adding Table Headers
We add a header row to the table with the title “PAN CARD DETAILS” spanning two columns.

<th colspan="2">: A header cell that spans two columns.<h1>: A level 1 heading inside the header cell.
Step 4: Adding Column Headers
We add another row with column headers “Name” and “Pan Number”.
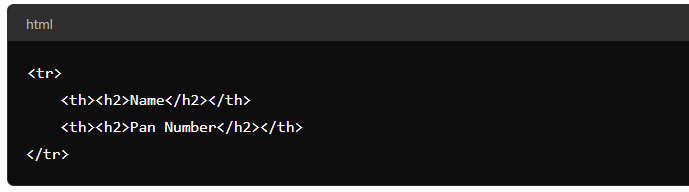
<th>: Header cells for the “Name” and “Pan Number” columns.<h2>: Level 2 headings inside the header cells.
Step 5: Adding Data Rows
We add rows to the table with the PAN card details.
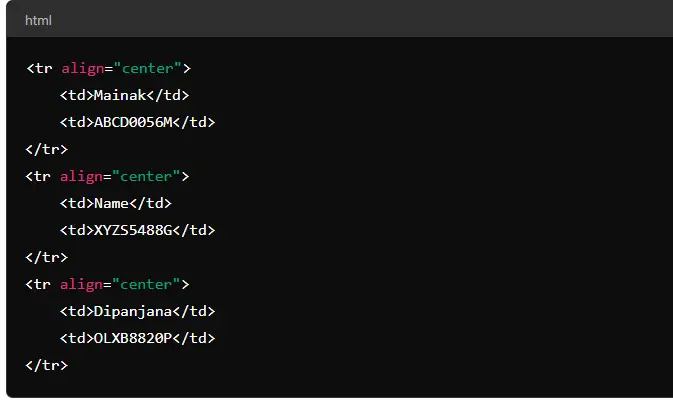
<tr align="center">: A table row with centered text.<td>: Standard cells containing the data for each PAN card entry.
Final Code
Summary
Article Name
Tutorial: Creating a Table in HTML
DescriptionSee that how to write a code to insert a table in html, with code explanation.
Author
Unique21
Publisher Name
UCTC
Publisher Logo