Hello! Today, we will learn how to create screen tips (also known as tooltips) in Microsoft Word. Screen tips can be useful when you want to provide additional information or instructions to readers without cluttering the main text. This is particularly useful for office projects where clarity and guidance are important.
Let’s See How to Create This Feature
Step 1: Open MS Word
To begin, open Microsoft Word by following these simple steps:
a. Press the “Windows + R” keys together.
b. Type “Winword” in the Run dialog box.
c. Press the “Enter” key or click on “OK”.
d. Now you are done! MS Word should be open on your screen.
Step 2: Type a Paragraph
Type some text in the document as you like. This text will be where you place your screen tips.
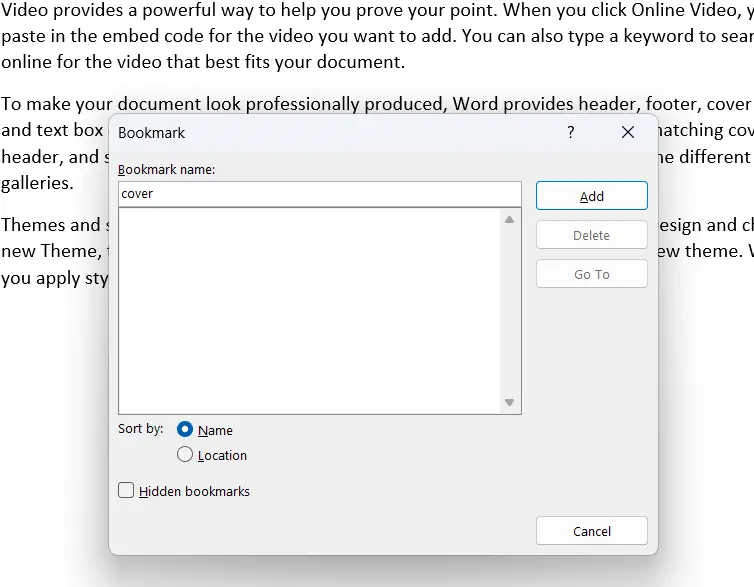
Step 3: Add a Bookmark
To create a screen tip, you first need to add a bookmark:
a. Place the cursor where you want to add the bookmark.
b. Click on the “Insert” tab.
c. In the “Links” group, click on “Bookmark”.
d. In the Bookmark dialog box, type a name for your bookmark.
e. Click on “Add”.
Step 4: Select the Word for Screen Tips
Highlight the word or phrase where you want the screen tip to appear, which should be near the bookmark location you created.
Step 5: Insert a Hyperlink
a. Press “Ctrl + K” or go to the “Insert” tab and click on “Hyperlink”.
Step 6: Link to the Bookmark
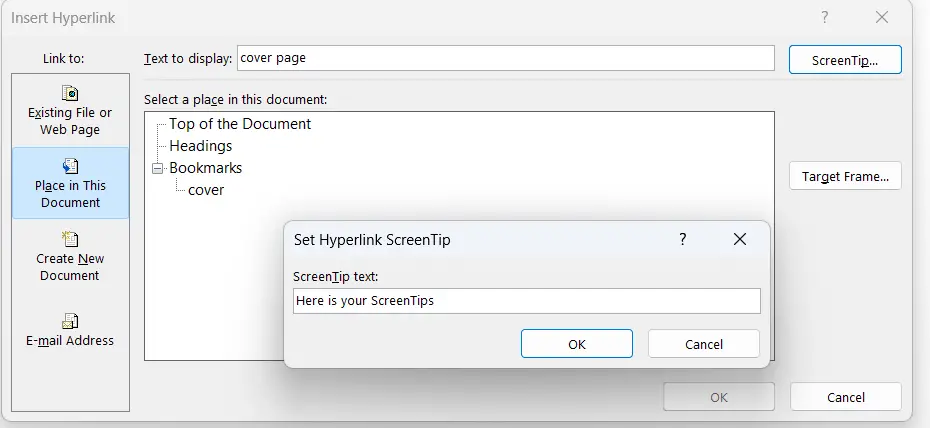
a. In the “Insert Hyperlink” dialog box, select “Place in This Document” from the left sidebar.
Step 7: Set the Screen Tip
a. In the “Select a place in this document” section, choose the bookmark you created.
b. Click on the “ScreenTip” button (usually located near the top-right corner of the dialog box).
c. In the “Set Hyperlink ScreenTip” dialog box, type the text you want to display as a screen tip.
d. Click “OK”.
Step 8: Finalize the Hyperlink
a. Click “OK” again to finalize the hyperlink with the screen tip.
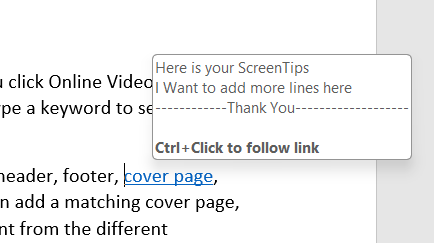
Now, when you hover over the hyperlinked text, you should see the screen tip appear with the information you entered.
Modifying the Screen Tips
If you need to modify the screen tip:
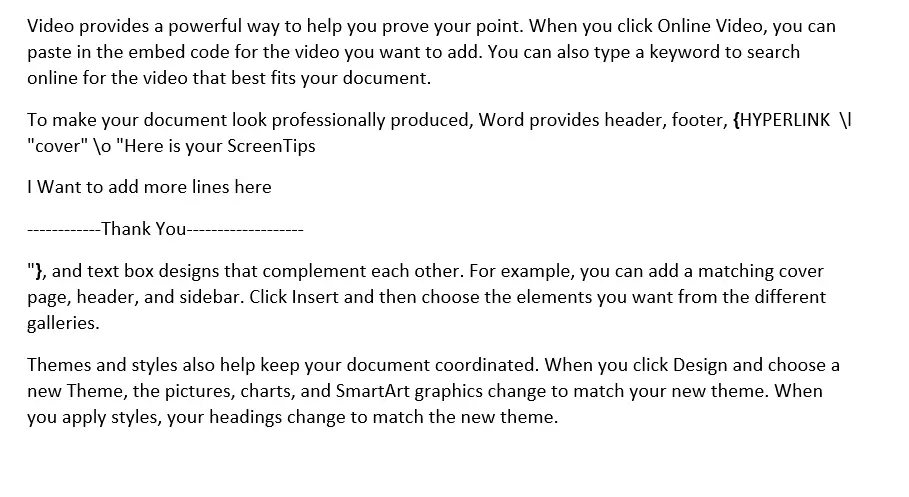
Step 9: Show Field Codes
a. Press “ALT + F9” to toggle the display of field codes. This will reveal the underlying code of your hyperlink.
Step 10: Edit the Screen Tip Text
a. Locate the text within quotation marks inside the curly braces {} and add or modify the text as needed.
Step 11: Hide Field Codes
a. Press “ALT + F9” again to hide the field codes and return to the normal view.
Now, move your cursor over the text, and you’ll see the updated screen tip.
Conclusion
Creating screen tips in MS Word is a simple yet powerful way to provide additional context or instructions without overwhelming your main text. This tutorial should help you enhance your documents with helpful tooltips. We hope you enjoyed this article and found it useful. Thank you!