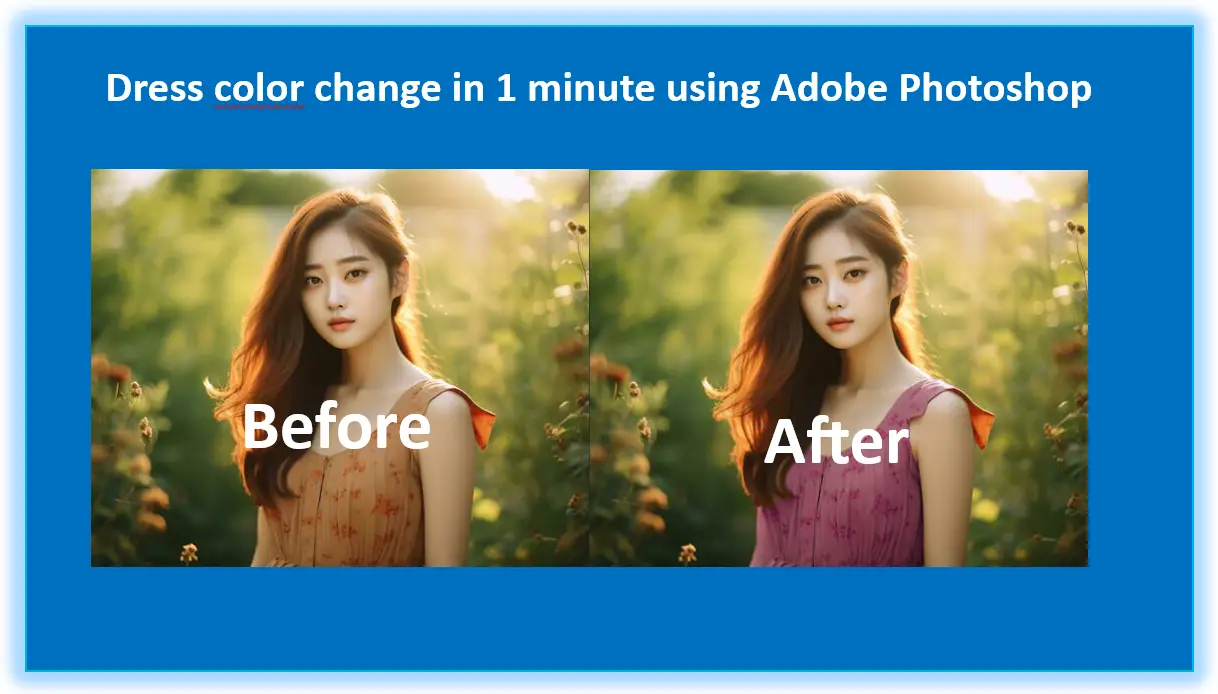
Photoshop Tutorial: How to Change the Color of a Dress in an Image
In this tutorial, we’ll walk through how to select a dress in an image and change its color using Adobe Photoshop. Follow these simple steps, and you’ll be able to alter the dress color in no time!
Step 1: Open Your Image
- Launch Photoshop and open the image you want to edit. You can do this by selecting File > Open, then choose the image file from your computer.
Step 2: Select the Selection Tool
- Choose a selection tool to outline the dress. You have two main options here:
- Quick Selection Tool: This tool automatically detects edges, making it easy to quickly select the area you want.
- Magic Wand Tool: Best for selecting areas with a similar color. If the dress is a uniform color, this tool works well. You can find both tools in the toolbar on the left side of the screen. Click and hold on the tool icon to reveal the other option if necessary.
Step 3: Activate “Add to Selection” Option
- In the Property Bar at the top of the screen, ensure that the “Add to selection” button is activated. This allows you to continue adding more areas to your selection as you go.
Step 4: Adjust Brush Size
- Adjust the brush size to fit the area you’re selecting. You can change the brush size by pressing the [ or ] keys on your keyboard, or you can modify it manually in the options bar at the top of the screen.
Step 5: Select the Dress
- Carefully paint over the area of the dress. If you’re using the Quick Selection Tool, click and drag over the fabric of the dress, and Photoshop will automatically try to detect the boundaries.
- If you’re using the Magic Wand Tool, click on the area of the dress, and it will select all areas of similar color. You can adjust the Tolerance in the options bar to control how much of the similar color gets selected.
Step 6: Go to the “Image” Menu
- Once you’ve made your selection, go to the Image menu at the top of the screen.
Step 7: Select “Hue/Saturation”
- From the Image menu, navigate to Adjustments and then select Hue/Saturation. This opens a new panel that will allow you to adjust the color settings.
Step 8: Change the Hue Level
- In the Hue/Saturation panel, adjust the Hue slider to change the color of the dress. Moving the slider left or right will shift the color to a different hue. You can preview the changes in real time as you adjust it.
Step 9: Adjust Saturation
- If you want to adjust how vibrant or muted the new color looks, adjust the Saturation slider. Moving it to the right will increase the color intensity, while moving it left will desaturate the color (making it more gray).
Step 10: Click OK
- Once you’re happy with the color changes, click OK to apply the adjustments to your image.
Step 11: See the Changes
- You’ve now successfully changed the color of the dress! Zoom in and check the areas to ensure the selection is perfect and the color looks natural. If needed, go back and refine the selection or tweak the Hue/Saturation settings again.
All Done!
Congratulations! You’ve successfully changed the color of the dress in your image. If you have any questions or need further assistance, feel free to leave a comment below. We’re happy to help!
Happy editing! 🎨✨
Video Tutorial
Summary

Article Name
Change Dress Color using Adobe Photoshop
DescriptionIn this tutorial, we'll walk through how to select a dress in an image and change its color using Adobe Photoshop. Follow these simple steps, and you'll be able to alter the dress color in no time!
Author
unique21
Publisher Name
UCTC
Publisher Logo

